Showing posts with label Healthy Livin'. Show all posts

Saturday, September 14, 2013

Cauliflower Pizza Crust!


Hi Everyone!

So i FINALLY hoped on the cauliflower pizza crust band wagon! 
My mom tried it out a bit ago, rant and raved about how good it was and sent me the recipe!
So i made it!

All i have to say is from now on...my pizza crust's will be made out of cauliflower!!
It tastes so good!
My hubby even liked it!!

I was super surprised how easy it was!


I made a couple small changes in how i made the "dough" so of course change things to how you see fit.


Recipe:

1 head of cauliflower- you will only be using the flowering parts so make sure its a pretty good sized one.

3 Eggs. 

2 Cups Mozzarella cheese- I thought that 2 cups seemed a bit much, the hubby and i have been cutting out most dairy products for the last few weeks, so i only used about 3/4 -1 cup.

1 1/2 tsp dried herbs- (oregano, thyme, rosemary, Italian seasoning, anything you wanna add really) I skipped this step and it still turned out great!

A couple big pinches of salt- I skipped this step also.


You will wanna preheat the oven to 450 degrees at some point.

Next you will wanna chop up your cauliflower into chunks, no bigger then 2 inches.
Throw them in a pot or pan and boil them till nice and soft!

Once its nice and soft, drain as much of the water as you can and throw it in either a food processor or blender to get it nice and mushed up.
 I actually just used a fork and some elbow grease in a mixing bowl and it worked just fine!

So if you used a processor or blender, once nice and smooth looking, transfer to a mixing bowl and add the eggs, cheese and herbs!

When i finished mixing it all up, it still seemed a bit to thin so i added about 1/4 cup of coconut flour to thicken it up a bit more and it was perfect! 

Mix together well!

Next just lay it out on a baking sheet, make sure its greased up good!
Also make sure its nice and even.

Bake that for about 18-20 mins, more if you like a crispy crust, which we do! 
So i cooked it a few minutes longer.


Remove from oven and top with any toppings you would like!


  We did pizza sauce, turkey bacon, spinach, onions, mushrooms on the hubby's side, tomatoes and a little bit of mozzarella cheese!

Once you are done adding your toppings, put it back into the oven for about 10-12 minutes, just enough time to cook some veggies and melt the cheese!


Done!!

Cut and serve!


YUUMMM! 

The crust was thick enough to be able to pick the pieces up and eat it, but i ate it with a fork still, toppings don't fall off that way!

If you are a pizza lover, like me, and don't wanna ruin your healthy eating to much, then this recipe is a muuust!! 

Hope you enjoyed the post and be sure to let me know if you try it!!


Thanks so much for reading and keep an eye out for more posts to come!


 photo kynasig_zpsbcae98d0.jpg


Tuesday, September 10, 2013

Paleo Butterscotch Chip Cookies! Dairy Free, Flour Free and Gluten Free!


Helloooo out there!

So today i am posting an amazingly delicious cookie recipe with you all!

These are Paleo approved, Dairy free, Gluten free and Flour free!

Lately my husband and i have been following the Paleo eating life style, as close to it as we can anyways! Sometimes you just gotta work with what you got. 
We have only been eating this way for a few weeks now, but i can already tell we are going to be sticking to it, we are loving it!!

That being said, i am still a sucker for desserts, especially cookies! 
So i went on the hunt for cookie recipes that would be Paleo friendly and not taste like i was eating dirt!
Its really not that much to ask for, right?!

Amongst my couple hours of searching (i was on a very important mission) i came across a fantastic blog that had tons of great recipes! 
THIS blog is where i found these amazing cookies!
Go check it out, you will looove!

Ok so back to the cookies! 
I did change a couple things in the recipe, so of course change it up if you feel its needed as well!


As you can see, there are only 6 cookies in this picture, the recipe made about 2 dozen...needles to say, they are a huge hit!!


I am lucky i got these couple of pictures before we ate them all up!
I will be for sure making these again!! 

The Recipe!

2 2/3 Cups Almond Flour (not packed down)
1 tsp Baking Soda
2 tsp Pure Vanilla
1/2 Cup Pure Maple Syrup (i wasn't going to spend almost $10 on maple syrup that's packed full of sugar, so i just used my sugar free regular syrup that i already had, worked great! You can also try honey!)
3 Stevia Packets (optional)
2 Large eggs
1/2 Cup Coconut Oil, Melted
1 1/2 Cups Butterscotch Chips (the original recipe called for chocolate chunks but i love butterscotch more! You can use any kind that you like, or even nuts or berries!

If you find the dough not quite thick enough, you can add more Almond Flour or add in some Coconut Flour like i did, i added about 2-3 TBS and was perfect!

I'm terrible at following step by step directions for baking things like this...so i just threw everything into a bowl and stirred it up!

Bake at 375 degrees for 10-15 minutes.
Make sure you grease that baking sheet good!

Like i said above, this recipe made about 2 dozen cookies, but they were on the small side, so it may make less if yours are bigger.

The blog i got this recipe from has a lot more pictures and goes way more in depth on the directions, if you find yourself needing that!

HERE is the direct cookie post!

I also tried the tip that she recommends about freezing the cookies...
DO IT!
 It is soooooo good!
I like a pretty firm cookie, and this recipe makes a pretty soft and chewy cookie, which is great but i needed a bit more firmness, popping them in the freezer did the trick!!
 It didn't freeze freeze them at all, just made them cold and a bit more firm!

YUUMMMMM.

Thanks so much for reading! 
Hope you enjoyed the passing along of a great recipe!
Be sure to let me know if you try this recipe out and how you liked it!


 photo kynasig_zpsbcae98d0.jpg


Homemade All Purpose Cleaner!


Hi Hi!

Today's post is going to be my all purpose cleaner recipe!

If you are like me and have been trying to replace chemical filled cleaners in your home with non chemical or less chemical filled ones, then this post if for you!

 I have been using this stuff for a couple months now and am loving it! 


Ok, so what you will need is:


Not pictured:
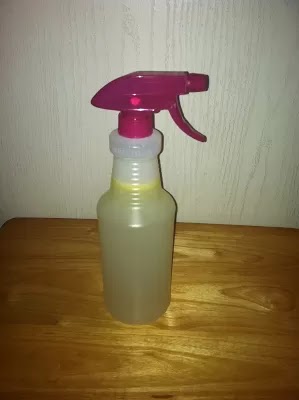
Spray bottle (preferably a glass one but all i had was plastic)
and Water!

That's it!

Now the alcohol is optional, i add a splash of it because i am a huge germaphobe when it comes to cleaning, well in general really, but specially when it comes to the cleanliness of my kitchen and bathroom! 
This stuff works great without it tho, so don't worry if you aren't comfortable adding it.

The stuff in the mason jar is castile soap.

Mix into the spray bottle:

*1 Cup white vinegar (if you only have apple cider vinegar, that will work too)
*2 TBS Liquid castile soap.
*Splash of  rubbing alcohol (optional)
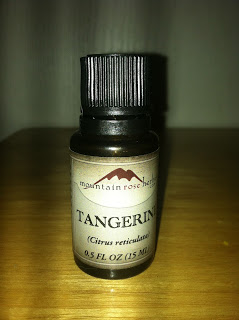
*About 20-30 drops of an essential oil of your choice. The one i used was tangerine.
*Fill the rest of the bottle with water.

And your're done!

You should give it a couple shakes before using and you should also store in a cool dark place (essential oils oxidize in sunlight)

I looove cleaning with this stuff!
It smells amazing and works so good!
I also find myself using at least half the amount of product as i would with a store bought cleaning spray!

If you have little kiddos in the house, here are a few essential oil choices that are "generally recognized as safe" for internal use by the FDA. 

Lemon
Grapefruit
Clove
Peppermint
Oregano 
Thyme

Hope you all enjoyed the post!
I love sharing my recipes with you all!
Be sure to let me know if you end up trying it out and how you like it!

Thanks so much for reading!


 photo kynasig_zpsbcae98d0.jpg


Homemade All Natural Liquid Laundry Soap!


Hi All!

So as the tittle says, today's post is going to be about my homemade ALL NATURAL liquid laundry soap! 

I have lots of pics and details so i'm just gunna jump right in!

So what you will need is:


That's it!

The washing soda you can find on the laundry soap isle in pretty much any grocery store. 
I paid under 4 dollars for it.

The Kirk's castile soap, i found on the body wash isle in Walmart. 
You get 3 bars for like 3.49 i believe, super steal!!

Quick side note:
If you are not familiar castile soap is, its an all natural bar soap that you can pretty much use on anything and everything you can think of!


This is a staple in our home! I make all kinds of things with it!
Watch out for those Recipes! 

Ok, back to the Laundry soap!

So what you are going to do first is grate up the entire bar of soap.


I actually enjoyed this part cause the soap smells sooooo good, even if it did take me a bit!

So next you are going to want to put the grated soap into a container that can handle HOT water, i used a mason jar.


Then add 2 cups of HOT water to melt the soap into liquid.
What i did was just used my espresso machine to get the water nice and hot!
A coffee pot would work great too!

(If you are going to use your coffee pot, go ahead and fill it all the way up, you are going to be using a lot of hot water for this)

So while that sits and melts all the way, grab a bowl and add 1/2 cup table salt and 1 1/2 cup of the washing soda, mix it together.
Next add 2 cups of hot water to the bowl with the salt and washing soda.
Now it wont dissolve it all the way but it will help break it down.


So set that aside and go back to the soap. 
Poor out 1 cup of the liquid soap, you are going to be adding more water, so i just put it into another bowl, just like the orange one above.
Add 3 more cups of hot water.

(be sure not to skip this step! at first i thought it was silly and i almost skipped it! So glad i didn't, there is a small reaction when you add the soap to the salt/soda mixture, making the soap start to gel up, so the extra water is much needed!)

Now add them together!
Poor slowly and mix well as you go.

Looks neat when you add them!


A wisk is perfect for mixing these!

Make sure you mix it well!
As i said above, the soap will start to gel up so stir stir stir!

Next what you will want to do is start adding the mixture to your 1 gallon container.
What i did was add a cup of mixture then add about 2 cups of hot water and either shake, like i did, or stir! 
Just depends on what kind of container you are using.

You will want to do that until you have filled up your gallon container.


I used a gallon tea container that i had around the house. 
Works perfectly!

After you have filled your gallon container, it will take a bit for the mixture to dissolve all the way, mine took about 15 mins or so.

You will also have to keep shaking it up as it cools, i shook it just whenever i remembered.
As the hot water cools, the mixture will thicken and become a gel type consistency.

Mine turned out kinda chunky, i don't think i shook it up enough.

Don't worry if yours does the same! It is still perfect to use, just doesn't look very pretty.

*Also, you can add an essential oil for a more distinct smell if you would like, i am going to do that next time.

Maybe this one:


Smells so gooood!

Ok, so when you are ready to use it on some clothes, the recommended amount is 1/2 cup for a full, lightly soiled load of clothes.
3/4 cup for a full, pretty soiled load.
Of course you can adjust this however you see fit.

I use about a half cup and i add it to water (works for cold, warm or hot water) in the bottom before i add clothes in. 

I LOOOVE how it has been cleaning my clothes.
Makes them smell so good, even without the essential oil.
Makes them feel so soft and even look brighter!

No nasty chemicals!

I made this a few weeks ago and have barely put a dent into the amount in the container!
I do laundry pretty regularly!
So this will last you a while!

I have also noticed that i don't need any dryer sheets when i put them into the dryer. 
How cool is that?!

Hope you enjoyed this post!

If you end up giving this a try, be sure to let me know!!

If you have ANY questions, please don't hesitate to ask below or Email me!!

I will also be doing a powdered laundry soap recipe soon, so keep an eye out!!


RECIPE:

1 cup Liquid Castile Soap.

1/2 cup Table Salt.

1 1/2 cup Washing Soda.

Lots of hot water.

1 Gallon Container. 


 photo kynasig_zpsbcae98d0.jpg


Healthy Smoothie Time!


Hi again! 

Today's post is all about a Healthy smoothie i have been looooving!
The past few month my husband and i have been really trying to eat as clean, green and healthy as we can. 
This smoothie has become a must have every morning in my house.

 I am kinda terrible about eating breakfast!
 I know the importance of it, but sitting down and eating a meal soon after i get up in the morning just doesn't work for me. 

I grab my big cup of coffee and i drink that till i start to feel hungry, which is usually lunch time. 

I knew that that wasn't good for my body so i decided to start making quick and easy breakfast smoothies!
Is it just me or are eating smoothies so much fun?
I actually look forward making them in the mornings, for my husband and i, because they are just so fun to make!
Maybe its turning all the healthy, not that great tasting food, into a suuuper yummy drink! 
Who knows! 
Anyways!

There is really no limit or guideline to what you can put in your smoothies.
But here is, in my opinion, the basics you need.


A leafy green, i use spinach. 
I have been wanting to try kale, i think i will after i use up this huge bag of spinach up.

Yogurt, i like to use greek yogurt, it makes the smoothie have a really nice thickness.
I switch off between 2 different kinds of this, plain and vanilla. 
The vanilla has a bit more sugar and calories in it, but sometimes you just need a bit more sweetness.

Milk, soy, almond, rice or even skim milk, something a bit healthier than regular, but whatever works best for you, or a sugar free juice.
 My husband and i loooove almond milk, we go thru it so quickly in my house!
I try to switch between almond milk and juice every other day, changes up the flavor a bit and just makes the milk last a bit longer.

Flax seed meal, just ground up flax seeds.

Chia seeds.

And of course, fruit!
My favorite is bananas!
My hubby loves mango! 


Fruit is a must for our smoothies, but you can of course leave it out, it still tastes great!


Doesn't it look so good! I wanna eat the picture! 

Sometimes i even eat another for lunch because it is so good.

Its so easy to fancy up too, you can add all kinds of things.

Thanks so much for reading! 
Please let me know if you give this recipe, or any recipe, a try and let me know how you like it! 


RECIPE:

1/2 cup plain greek yogurt. 
Sometimes i do 1/4 of plain and 1/4 of Vanilla, depending on my sweet tooth.

1 BIG handful of spinach.

1 banana. 
When i am thinking ahead, i cut one up and put it in the freezer at night, thickens it a tad, but usually i am to lazy. 

1/2 cup Almond milk or Juice. 

1 tbsp Flaxseed meal.

1 tbsp Chia seeds.

ENJOY!


 photo kynasig_zpsbcae98d0.jpg


Capsuling Fun!


Heloooo!


So today i just wanted to do a quick post on a little project i have been doing the last few days.


 Making my own capsules!
I am way overly excited about this.

I have been wanting to make my own capsules for a while now, but just never got around to it, i really should have done it sooner.

In my messy station picture ^, please dont mind my classy plate, i am capsuling turmeric!

*Turmeric loves to stain clothes, so be sure to wear appropriate clothing when messing with this stuff.

I will be doing a blog post all about turmeric here soon, so much info, so keep an eye out!


I have also been capsuling cinnamon.


If you are wondering, my husband and i take 2 of each every morning.


If you have been wanting to capsule your own herbs or spices, you definitely should! 
It is very inexpensive and very easy!

The capsule machine i have been using is one i have borrowed, thanks grams! :) 

You can buy the capsule machine and the empty capsules at pretty much any health food store, the one i am using was under $20!  
The empty capsules are really cheap too, around 200 of them for like 3 or 4 bucks!
Some places you can buy larger amount as well.

If you don't live near a health food store, HERE is a great place to buy both, online!

Thanks so much for reading and i hope you lovelies have a wonderful night!

Be sure to keep an eye out for upcoming posts!


 photo kynasig_zpsbcae98d0.jpg


The Many Benefits of Chia Seed's!


Hi Hi!

So today's post is going to be all about the amazing benefits of chia seeds!


For a couple of weeks now, i have been incorporating a couple tablespoons of chia seeds into my husband and my diet everyday.

With it only being a couple of week of eating them, i can already tell a pretty big difference.
It fills me up quicker and gives me a lot more energy throughout the day!
Who doesn't want both of those??

So the way my husband and i have been eating these is adding 2 tablespoons to our morning smoothies. Easy as that. 
You can also just add them to juice or milk or even water. 
The texture of the seeds reminds me a lot of poppy seeds! I honestly hardly even notice them.

They have a very light, almost nutty flavor.
I don't notice the flavor at all when its in food.


They are the size of a sesame seed. 


If you don't know a lot about chai seeds, i am here to help!

Chia seeds, or Salvia Hispanica, come from a flowering plant belonging
to the mint family. 
This annual herb grows over 3 feet tall and produces pretty clusters of 
purple or white flowers.


Isn't it pretty!


Ok, so now some amazing things about chia seeds and what they do and help with!


Help with weight loss:


They are popular in the aid of weight loss because of there ability to reduce food cravings and 
make you feel fuller faster, so you eat less.
How do they help you feel fuller quicker, you ask?
Well when chia seeds are put into liquid the outer layer of the seed swells, forming a bulky gel.
They absorb 10 times there weight in water, so when eatin, the gel leaves less room for food, 
Cool in my book!


Don't they look so crazy with their gel!

Chia seeds are not a grain.


They are a great natural boost of energy and the gel also helps keep you hydrated all day.


Diabetic?


Chia seeds slow down how fast our bodies convert carbs into simple sugars as well as reduce glucose levels.


Chia seeds are a great source of Omega-3 fatty acids.
They are the richest plant source of Omega-3, in fact, a mere 3 1/2 tablespoons contains as much Omega-3s as a 32 ounce piece of salmon!
If you are like me, and do not like eating fish or have a hard time taking fish oil supplements, these seeds are a perfect way to get your daily dose!

Chia seeds are also a great source of fiber, 2 tablespoons contain 10 grams!

Chia seeds can also be ground up and used as a flour alternative for those with
gluten allergies or eating a gluten free diet.


The cooking options are endless with using these powerful things!

You can add them to pretty much anything! Oatmeal, shakes, eggs, cookies, muffins, breads...the list goes on and on!


These things are easy to get your hands on, i got mine in the bulk bin section at Winco!

$9 for a pound!
You can also find them at any health food store or even an organic isle in your regular grocery store.


If you find yourself not being able to get a hold of some, email me and i can help! 


Be sure to keep an eye out for many recipes with these bad boys in it!

 Can't wait to play around with them more.


If you have any more questions, have some good recipes or are wanting even more info about Chia seeds, feel free to email me or comment below. 

I would love to hear from you!


Thanks so much for reading and let me know if you give these a try!


Have a wonderful, happy and healthy day!


 photo kynasig_zpsbcae98d0.jpg